
The “Perfect” Exposure Myth: Stop Guessing Your Levels
Exposure is often treated as a technical equation: find the correct number, place the image in the right range, and the job is done. In practice, cinematic exposure is more nuanced.
A technically accurate exposure provides a reliable foundation, but it does not determine the final emotional impact of an image. Exposure is also a creative tool that influences mood, contrast, visibility and the way an audience experiences a scene.
The key is understanding the technical baseline before deliberately moving away from it. The Zone System provides a useful framework for doing exactly that.
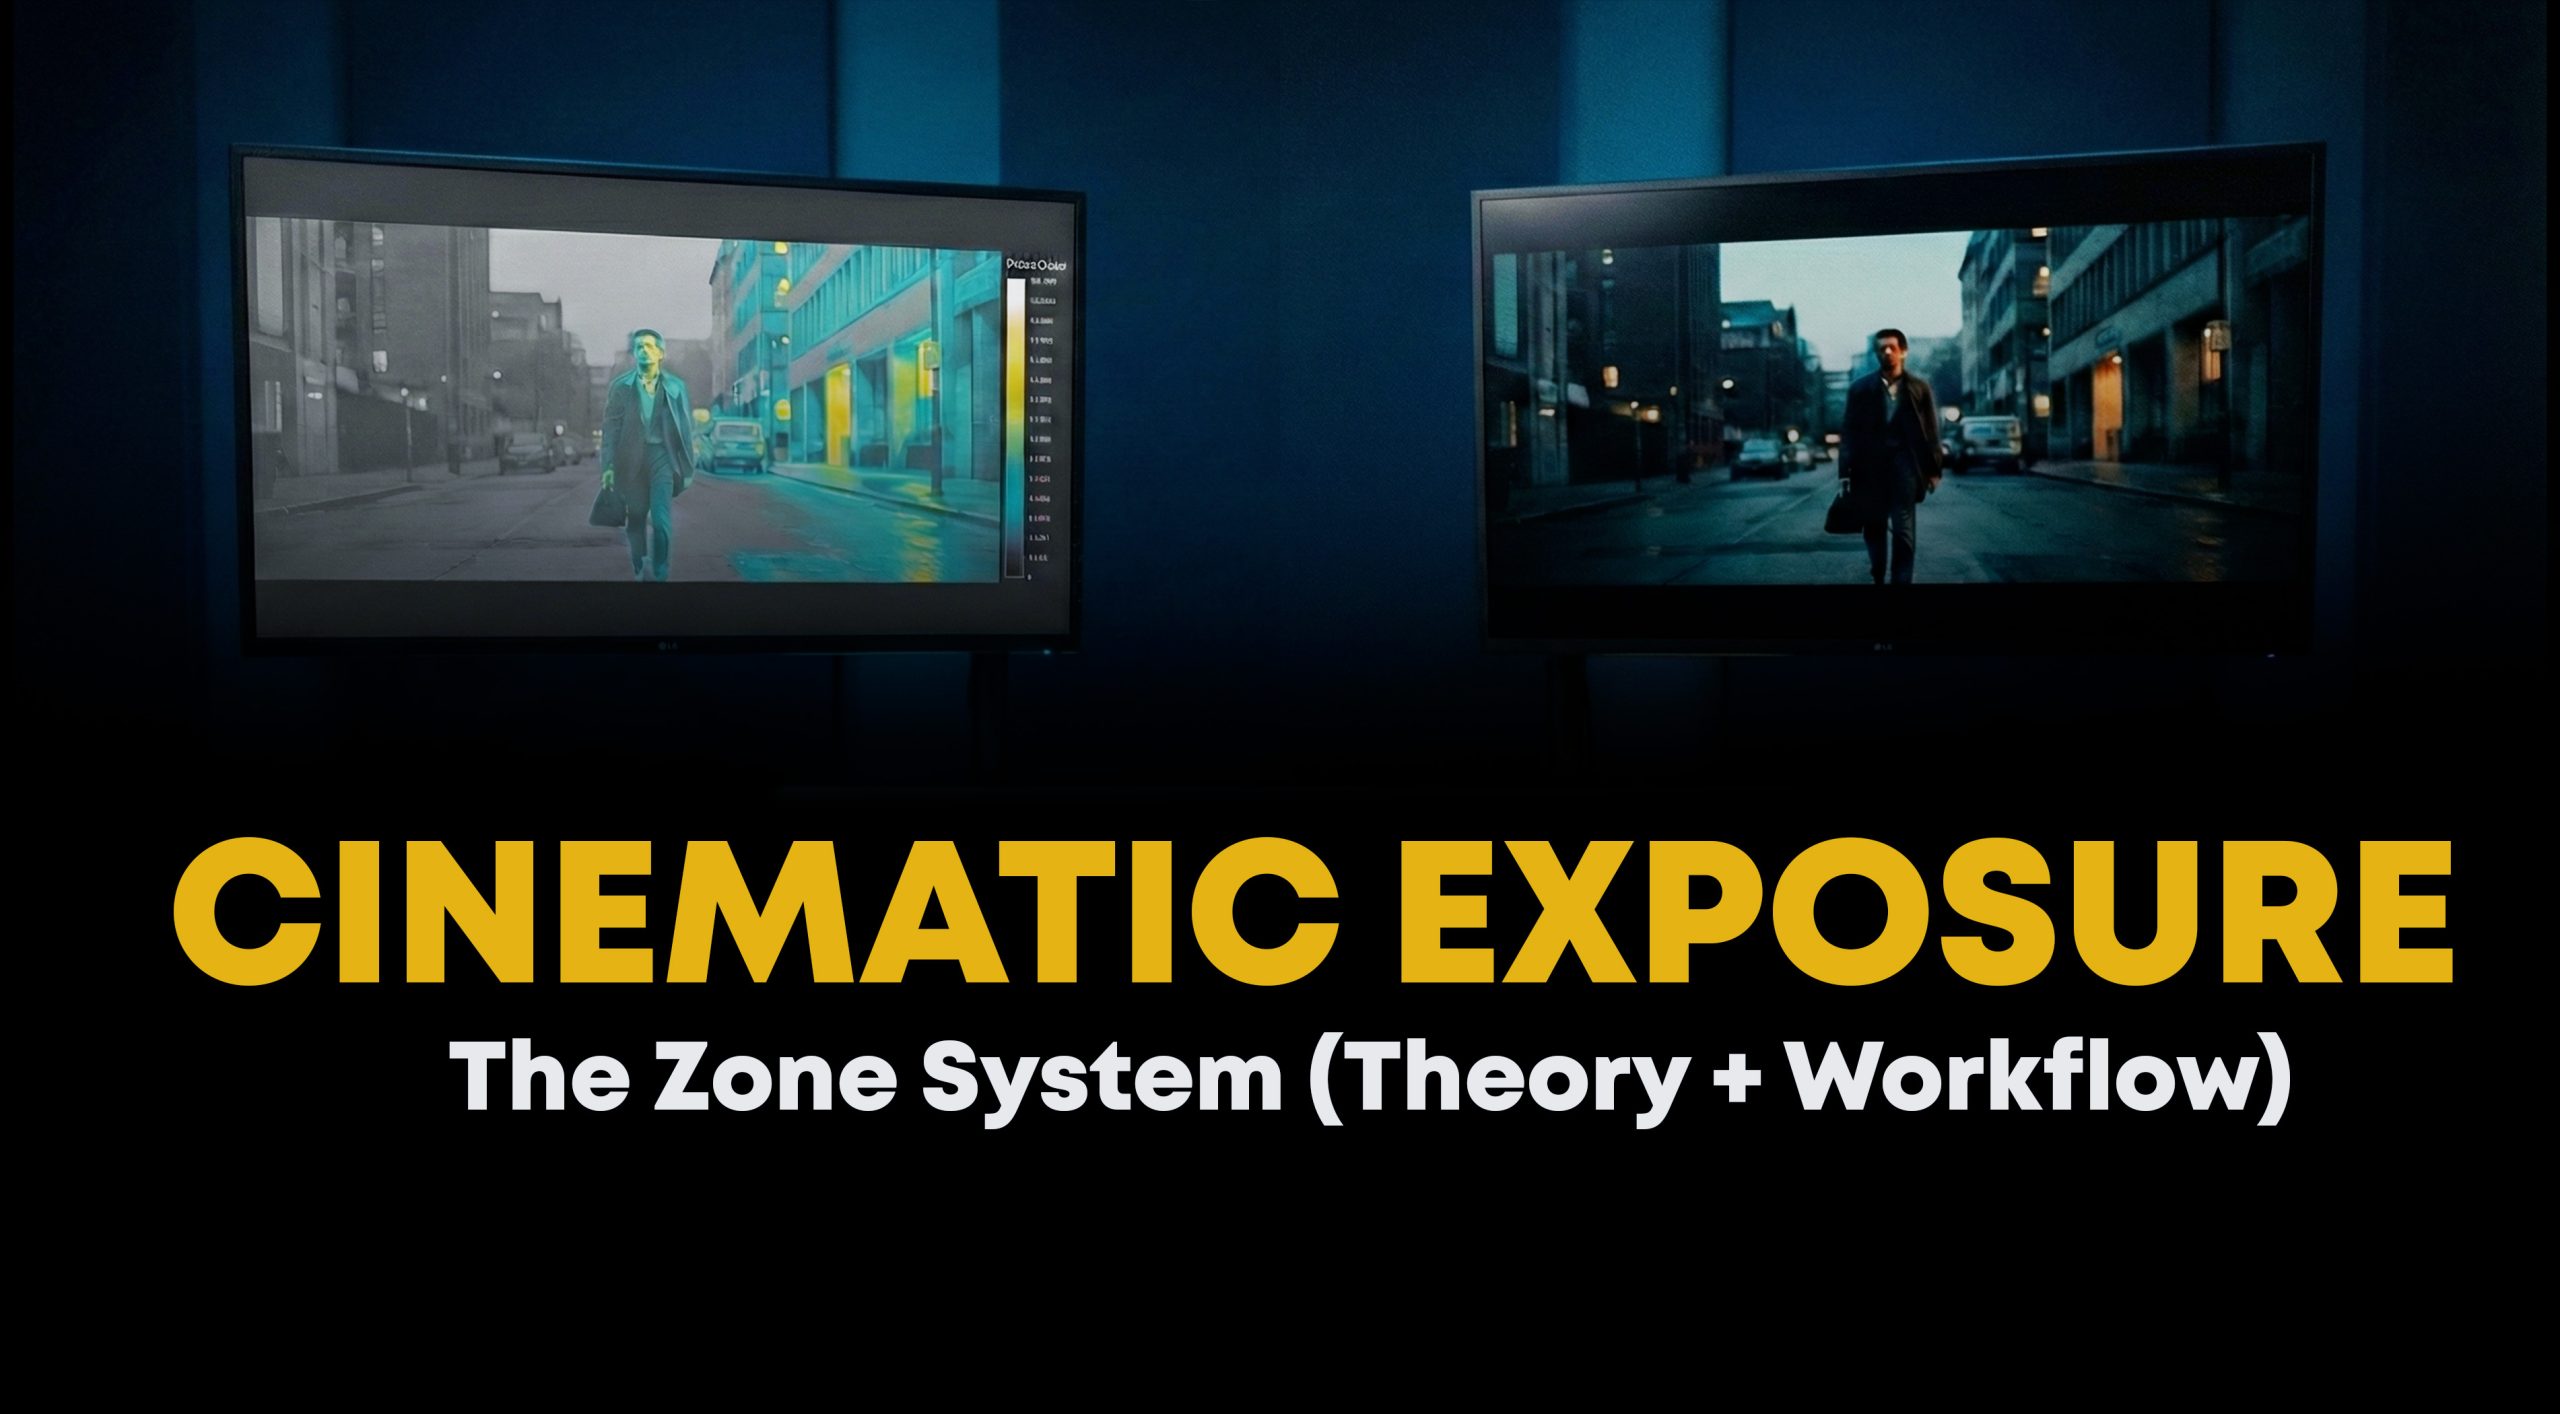
This article explains how the Zone System can be applied to modern digital cinematography, including waveform monitoring, IRE values, False Color and creative exposure decisions in DaVinci Resolve.
Watch the Full Video
Watch Ali’s complete breakdown of the Zone System, cinematic exposure and creative grading in DaVinci Resolve:
Understanding the Zone System
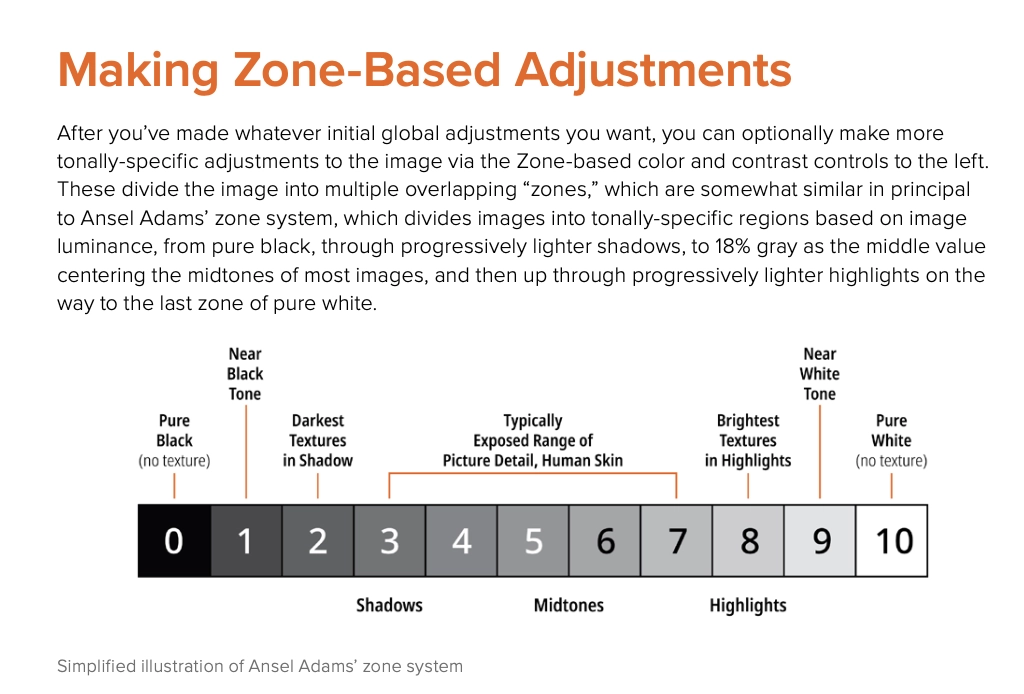
Developed by Ansel Adams and Fred Archer around 1939–1940, the Zone System divides tonal values into 11 zones, ranging from Zone 0 (pure black with no visible detail) to Zone 10 (pure white with no remaining texture).
Although originally developed for black-and-white photography, the underlying principle remains highly relevant to digital cinematography. The system provides a structured way to evaluate tonal relationships and understand where important information sits within an image.
| Zone | Description | Approximate IRE Range (Rec.709) | Typical Use |
|---|---|---|---|
| 0 | Pure black | 0 IRE | No visible detail |
| 1 | Near black | 0–10 IRE | Deep shadows and noise floor |
| 2 | Dark shadow texture | 10–20 IRE | First visible shadow detail |
| 3 | Shadows | 20–30 IRE | Dark clothing, hair and shadow areas |
| 4 | Dark midtones | 30–40 IRE | Darker tonal information |
| 5 | Middle grey | 40–50 IRE | 18% grey reference |
| 6 | Light midtones | 55–70 IRE | Common skin-tone range |
| 7 | Highlights | 70–80 IRE | Bright surfaces with texture |
| 8 | Bright highlights | 80–90 IRE | Strong highlights retaining detail |
| 9 | Near white | 90–95 IRE | Minimal remaining highlight detail |
| 10 | Pure white | 100 IRE | Clipping or pure light |
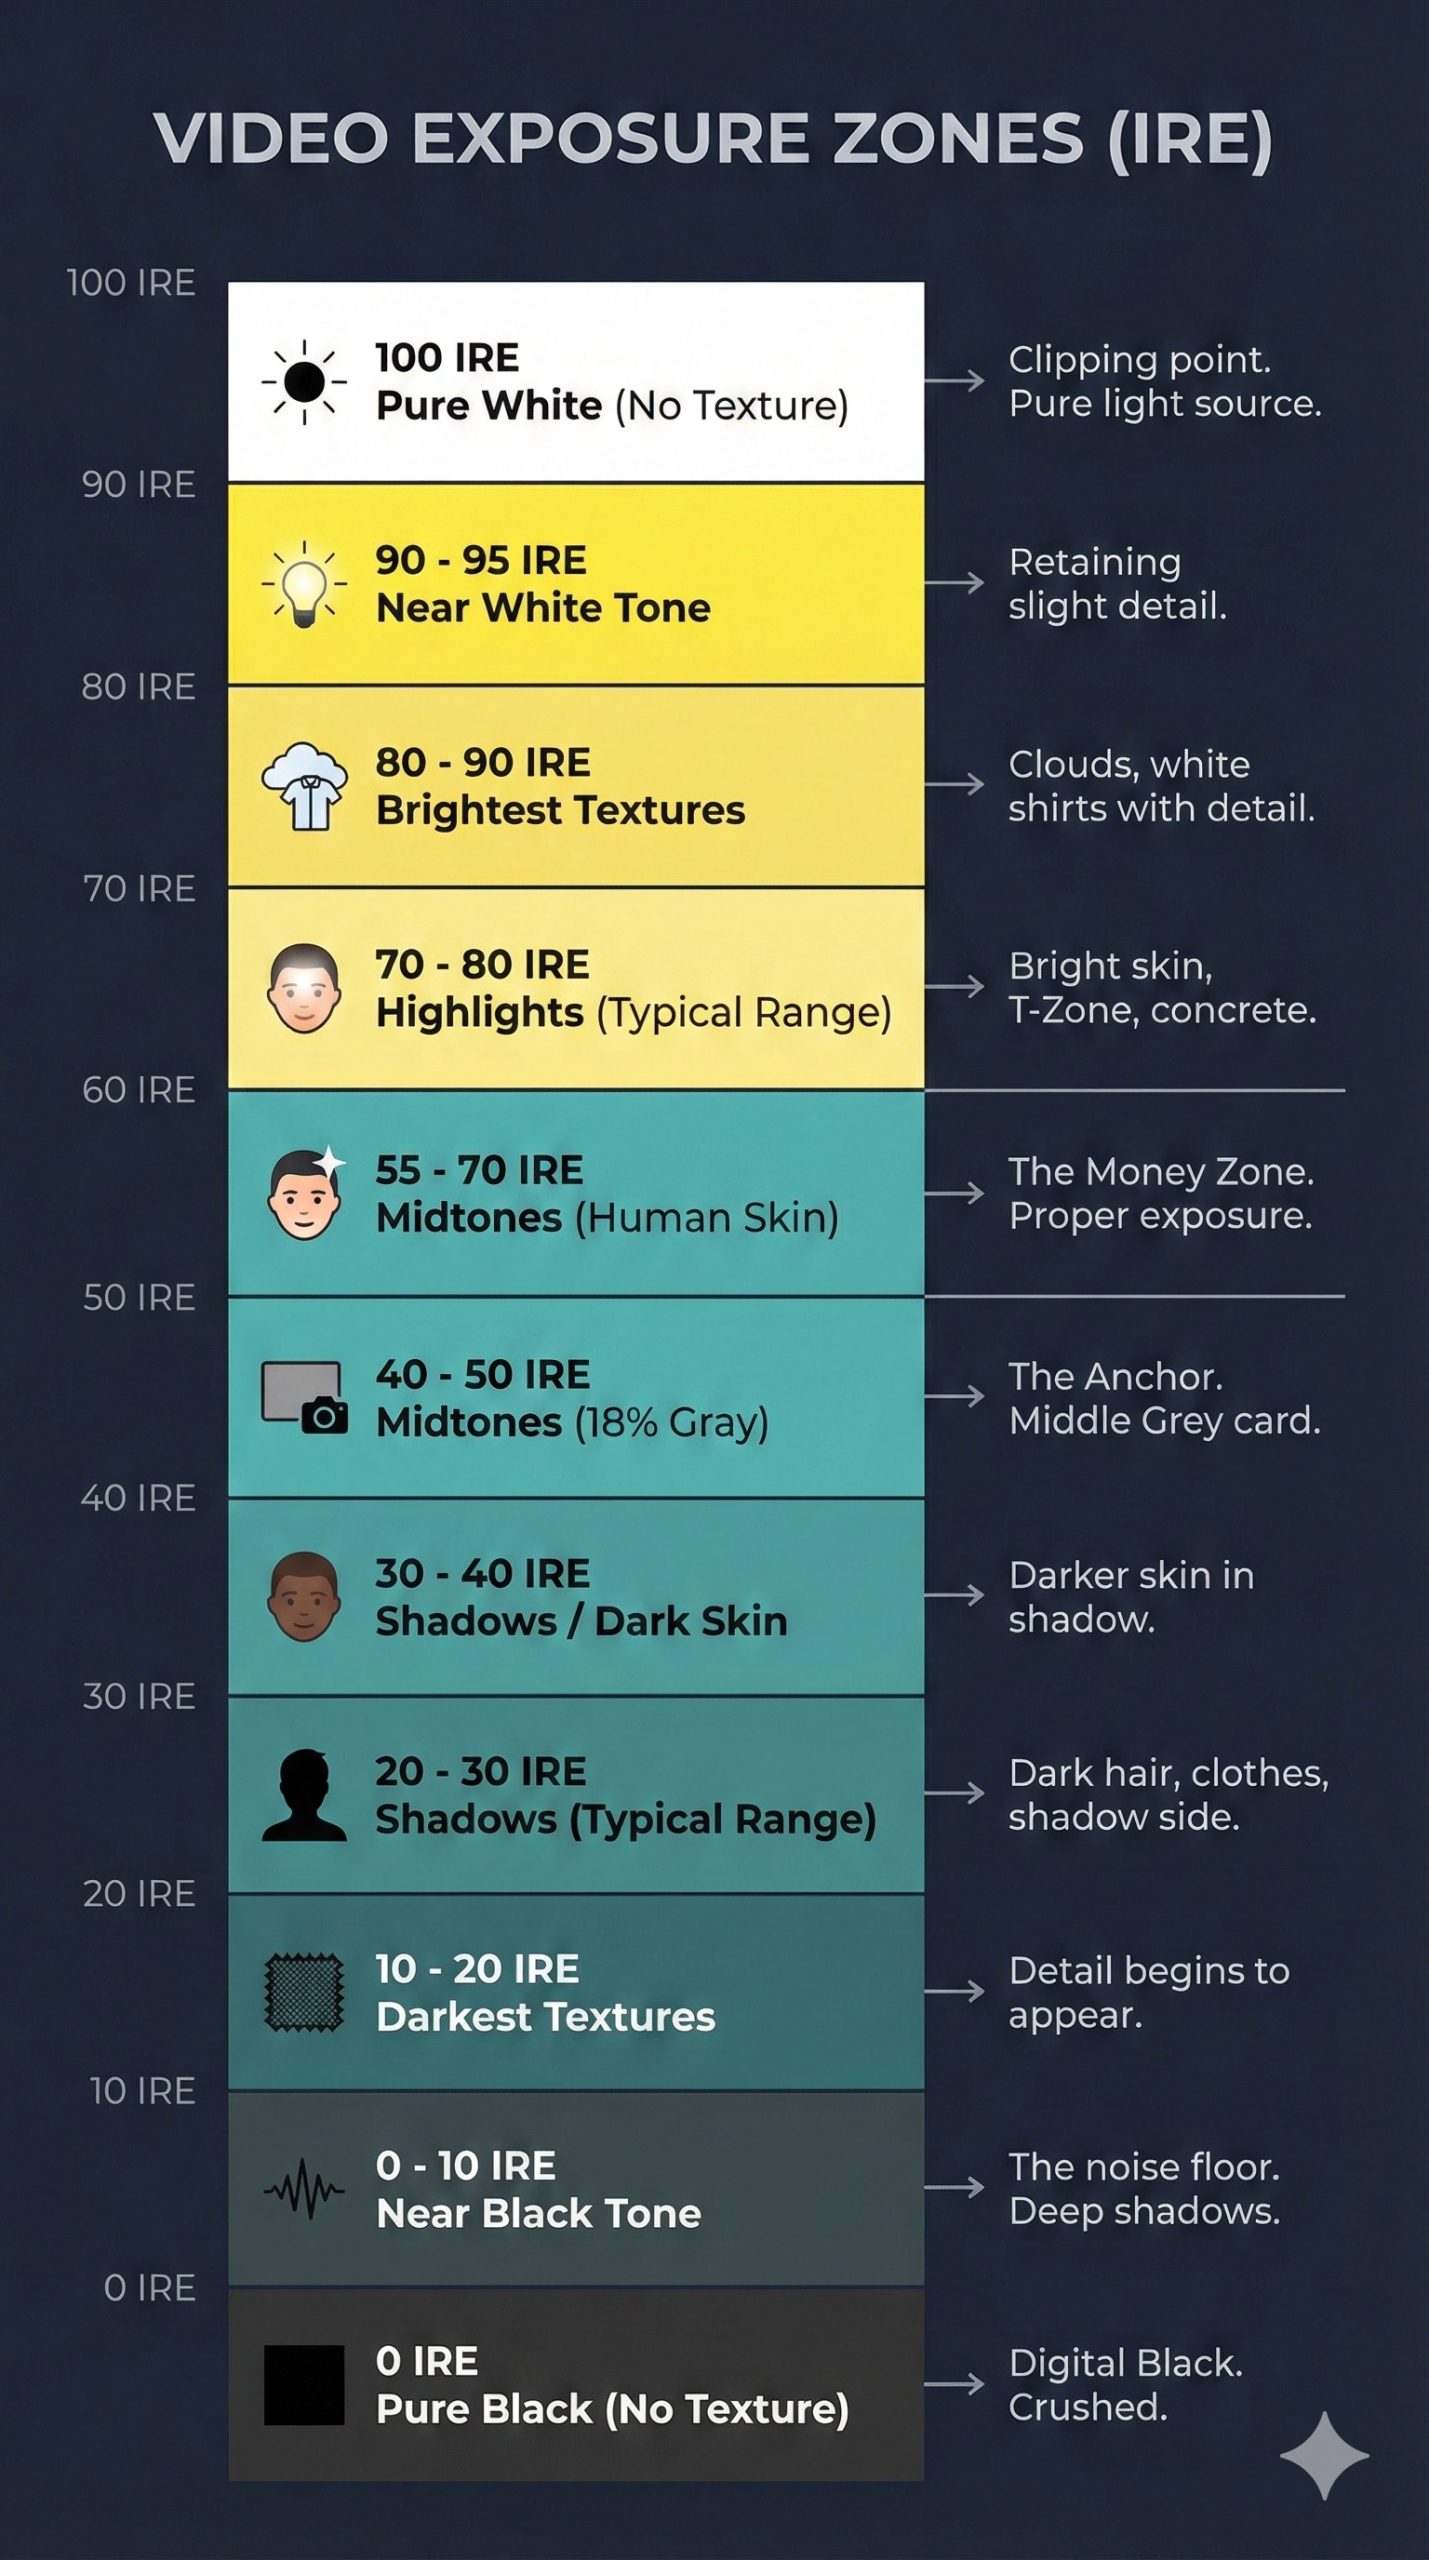
These values should be treated as practical references rather than absolute rules. The exact placement of tonal values depends on the camera, gamma curve, colour space and viewing transform.
Zone 5: The Importance of Middle Grey
Zone 5 represents middle grey, traditionally associated with approximately 18% reflectance. It acts as an important exposure reference because camera metering systems are generally designed around a middle-grey assumption.
In logarithmic camera profiles, middle grey is represented differently depending on the manufacturer. Common reference values include:
- ARRI Log profiles: approximately 40%
- Sony S-Log3: approximately 41%
- Canon Log profiles: approximately 39%
- Rec.709: commonly around 45–50%, depending on the gamma curve
Knowing where middle grey sits in your camera’s image pipeline is essential. Without understanding the reference point, exposure decisions can become dependent on visual guesswork rather than measurable information.
However, middle grey is only a starting point. It establishes a technical anchor rather than dictating how every shot should ultimately look.
The Practical Exposure Range
Most important visual information tends to sit around the middle portion of the tonal scale. This includes skin tones, environmental texture and many of the details that communicate information to the viewer.
A useful way to think about this is as a practical working range extending several stops above and below middle grey.
Within this range, exposure decisions primarily focus on preserving meaningful image information. Outside it, shadows and highlights can increasingly become creative tools.
Deep shadows may be intentionally obscured to create tension or mystery, while bright highlights can be allowed to approach clipping for atmosphere or visual emphasis. The goal is not to keep every part of an image within a mathematically perfect range, but to understand what information is being retained or sacrificed.
Establishing Technical Exposure in DaVinci Resolve
Before making creative adjustments, it is useful to establish a technically reliable starting point.
DaVinci Resolve provides several tools for evaluating exposure, including waveforms, RGB scopes and False Color. These tools help replace subjective monitor-based judgement with measurable image information.
Configure the Waveform
When working with waveform monitoring, use a scale that makes exposure relationships easy to interpret. A percentage-based scale provides a straightforward reference from 0 to 100, making it easier to compare tonal values against common IRE ranges.
The waveform should not be used as a rigid set of instructions. Instead, it should provide context for where important elements of the image are positioned.
Establish Your Reference Points
A practical workflow begins by identifying reliable tonal anchors.
Middle grey can be used as the primary technical reference. If a grey card is available, it provides a controlled exposure target. In other situations, a neutral reference within the scene may be useful, although it should be evaluated carefully.
In a Rec.709 workflow, middle grey commonly falls around the midtone region of the waveform.
Skin tones can then be evaluated in relation to the scene and intended look. Depending on complexion, lighting conditions and the display transform, skin tones may occupy a range rather than a single fixed value.
The objective is not to force every subject into an identical IRE number. Instead, the waveform should help confirm that important tonal information is being captured with sufficient detail.
Using False Color for Exposure Evaluation
False Color is one of the most efficient tools for evaluating exposure because it converts luminance values into clearly identifiable colour ranges.
Instead of continuously interpreting waveform data, False Color allows cinematographers and colourists to quickly identify where different parts of an image fall within the exposure range.
Depending on the implementation, False Color can help identify:
- Deep shadows approaching the noise floor
- Middle-grey reference areas
- Skin-tone exposure ranges
- Bright highlights retaining detail
- Areas approaching or reaching clipping
The specific colours and thresholds vary between cameras, monitoring systems and plugins. For this reason, it is essential to understand the exposure mapping used by the particular False Color tool.
Match False Color to the Camera Profile
False Color is only reliable when the monitoring configuration matches the footage being evaluated.
For example, Sony S-Log3 and ARRI LogC use different logarithmic encoding curves. Using an exposure map designed for one profile to evaluate another can produce misleading results.
Always confirm that the False Color settings correspond to the camera profile, gamma curve and colour-management workflow being used.
Evaluate Exposure Before Creative Processing
Exposure evaluation should generally take place before creative LUTs, contrast adjustments or look-development nodes significantly alter the image.
Once a creative transform changes the tonal distribution, monitoring tools may describe the final look rather than the original captured data.
Checking the image early in the workflow makes it easier to determine whether the source material contains clean shadow information, protected highlights and sufficient latitude for further grading.
Technical Exposure vs Creative Exposure
Technical exposure and creative exposure serve different purposes.
Technical exposure focuses on capturing clean and usable image data. Creative exposure determines how that information is ultimately presented to the audience.
Confusing these two stages can lead to unnecessary problems during production and post-production.
A technically balanced image does not need to remain visually neutral. Once the captured data has been evaluated, the grade can deliberately move tonal values to create a specific emotional response.
Naturalistic Exposure
A naturalistic approach generally maintains balanced tonal relationships and preserves detail across important areas of the frame.
Films with a polished, controlled visual style often use this approach to create clarity while maintaining cinematic contrast.
High-Key Exposure
High-key imagery typically uses brighter tonal values, reduced contrast and lifted shadows.
This approach can create a sense of openness, optimism or artificiality depending on the production design and colour palette.
The important distinction is that a high-key image does not necessarily mean uncontrolled overexposure. Brightness can be intentional while highlight detail and tonal relationships remain carefully managed.
Low-Key Exposure
Low-key imagery prioritises shadow and selective visibility.
This approach is frequently used in thrillers, noir-inspired cinematography and dramatic storytelling, where darkness can create tension and direct attention toward specific elements of the frame.
A low-key final image does not necessarily require underexposing the original capture. In many situations, capturing clean shadow information first provides greater flexibility when shaping the image during colour grading.
Creating a Moody Look Without Sacrificing Image Quality
One of the most common exposure mistakes is underexposing footage during production simply because the intended final image is dark.
A dark grade and an underexposed capture are not the same thing.
If a camera is significantly underexposed, shadow information may fall into the noise floor. Attempting to recover or manipulate those areas later can reveal colour noise, fixed-pattern noise and other image artefacts.
A more flexible approach is to expose important information appropriately during acquisition and then shape the tonal structure during post-production.
For a darker or moodier look, this may involve:
- Capturing sufficient detail in important shadow areas
- Protecting skin tones and key subjects
- Maintaining highlight information where possible
- Lowering selected tonal regions during the grade
- Using contrast, curves and selective adjustments to control the final mood
This approach preserves more creative options because the grade is built from usable image data rather than compromised source material.
The Role of Camera Dynamic Range
The amount of flexibility available during grading depends heavily on the camera’s sensor, codec and dynamic range.
Cameras with greater dynamic range generally provide more latitude when adjusting shadows and highlights in post-production. High-end cinema cameras can often tolerate more aggressive exposure manipulation while maintaining image quality.
Cameras with limited dynamic range require greater precision during acquisition. If important shadow information is recorded too close to the noise floor or highlights are clipped, there may be less opportunity to recover those areas later.
This does not mean that one camera is universally better than another. It means that exposure strategy should be adapted to the capabilities of the equipment being used.
Understanding the limits of a camera allows cinematographers to make more informed decisions on set and gives colourists better material to work with in post-production.
Why the Blue Channel Deserves Attention
When evaluating image quality, it can also be useful to inspect individual RGB channels.
The blue channel is often more susceptible to visible noise, particularly in underexposed areas. A clean composite image can sometimes hide channel-specific noise that becomes more noticeable after aggressive colour manipulation.
Checking individual channels can help identify potential problems before they become amplified during grading.
This is particularly useful when pushing shadows, making substantial colour adjustments or working with footage captured in challenging lighting conditions.
The Zone System as a Creative Framework
The value of the Zone System is not that it provides a fixed formula for every shot.
Its real value is that it creates awareness.
It helps cinematographers and colourists understand where tonal information exists, where detail is being lost and how exposure decisions affect the flexibility of an image.
Once a technical baseline is established, those principles can be deliberately adjusted to serve the story.
A subject may be placed deeper into shadow to create tension. Highlights may be lifted to create an airy, dreamlike atmosphere. Contrast may be reduced or exaggerated depending on the emotional requirements of the scene.
These decisions become more intentional when they are based on an understanding of the available image data.
Key Takeaway
There is no single “perfect” exposure that applies to every cinematic image.
Technical exposure provides the foundation by helping preserve clean and usable image information. Creative exposure builds on that foundation by shaping tonal relationships to support mood and storytelling.
The Zone System offers a practical framework for understanding this relationship. Use it to identify your technical baseline, evaluate the information captured by the camera and make deliberate creative decisions during the grade.
The goal is not to follow exposure rules mechanically. It is to understand them well enough to know when and why they should be changed.
Quick Reference
- Zone 0: Pure black with no visible detail
- Zone 5: Middle grey, traditionally associated with 18% reflectance
- Zone 6: A useful general reference area for lighter midtones and many skin-tone exposures
- Zone 10: Pure white with no remaining detail
- False Color: A visual tool for quickly identifying exposure ranges
- Technical exposure: Focuses on capturing clean and usable image data
- Creative exposure: Shapes tonal values to achieve a desired mood
- Low-key imagery: Does not automatically require underexposing the original capture
- Dynamic range: Determines how much flexibility the image retains during post-production