The 10 Tips
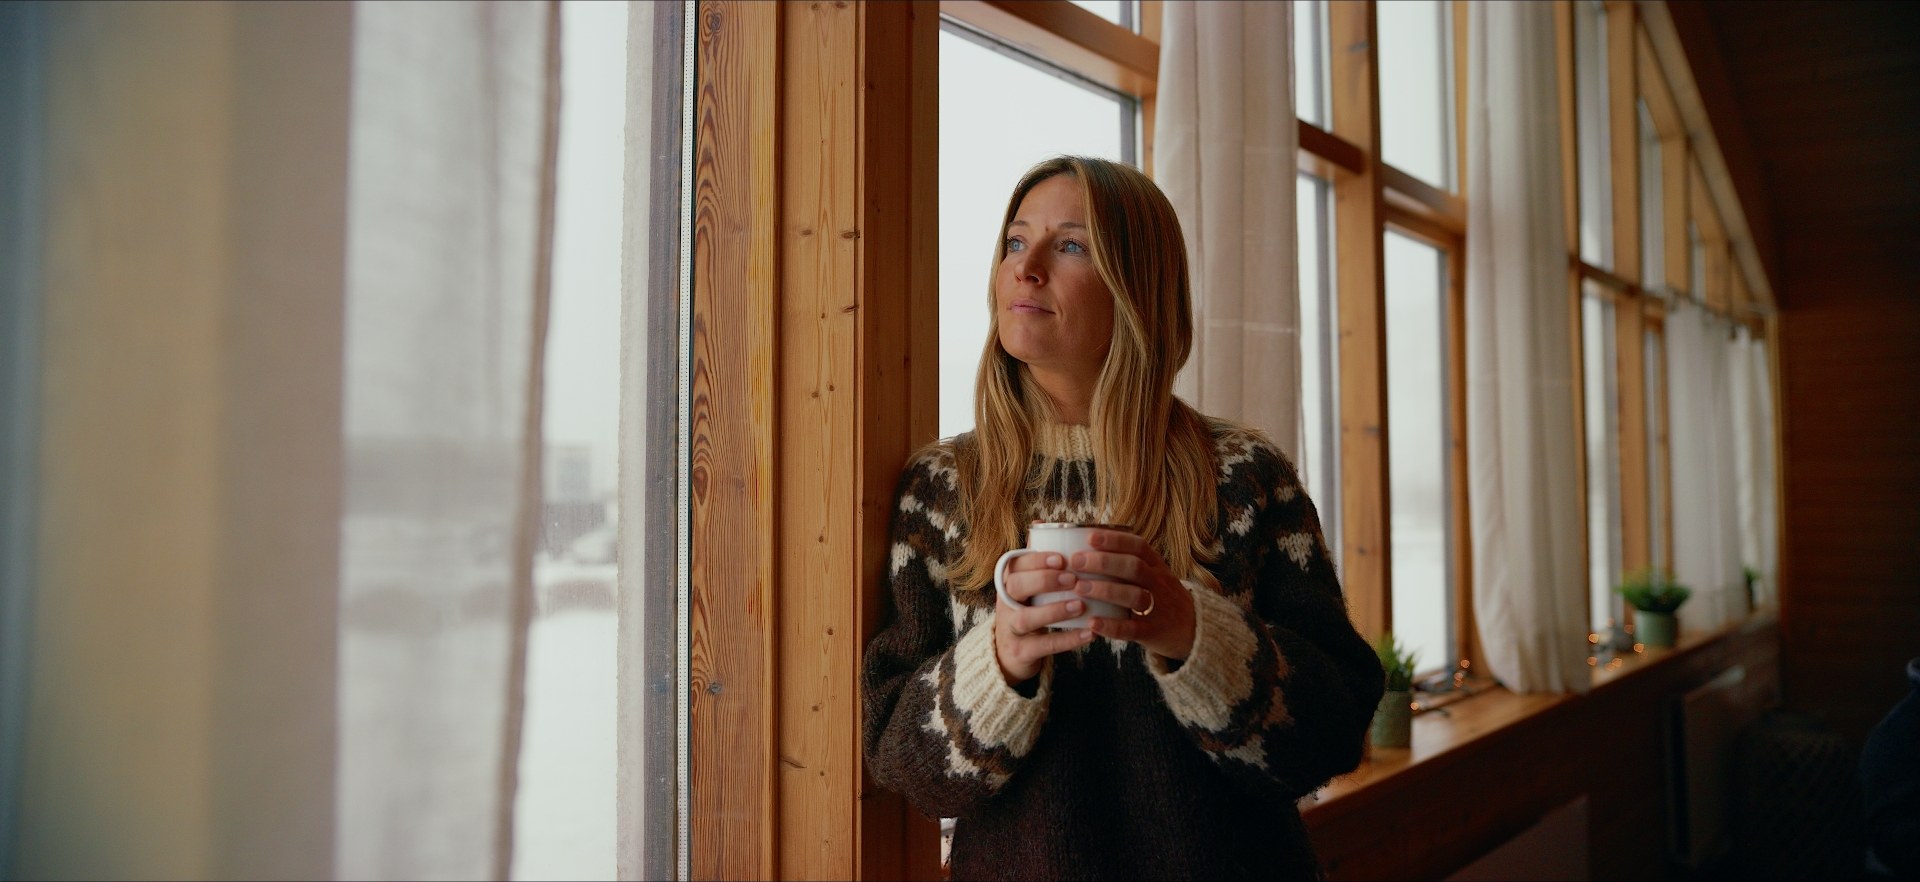
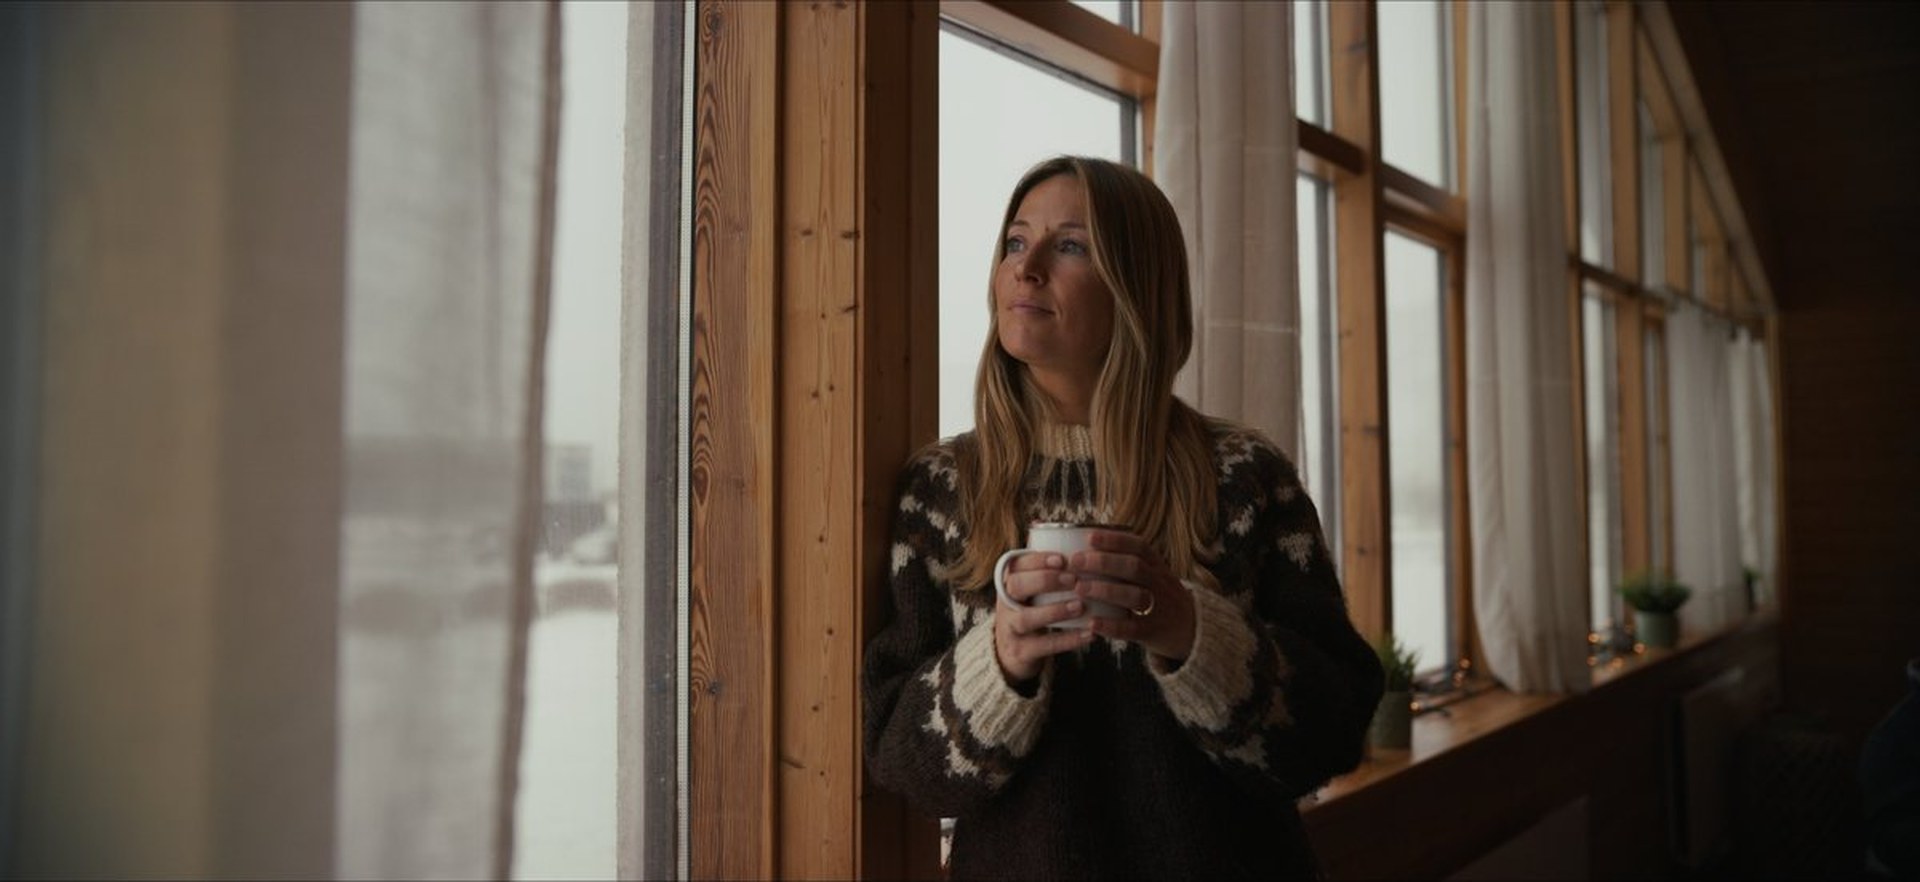 OriginalAll 10 tips
Below each tip is a live preview of the Resolve controls it uses, running on the shot from the video. It’s a simplified preview in your browser, so your exact values in Resolve will differ.
DaVinci Resolve · Color grading
Tired of chasing Instagram Reels for the best pro way to adjust exposure, highlights, saturation and more?
I’ve put all the viral tips and tricks into one video: ten tips, start to finish, applied to a single shot. Some you may already know. Others you almost certainly don’t.
The best part is that you can control every core element of your grade in the free version of DaVinci Resolve.
Hey, I’m Ali, and in this guide I’ll walk you through each tip so you can follow along, grade the same shot, and then apply the workflow to your own footage.
Download the sample clip from the link in the video description and grade along with me.
Footage credit: Florent Piovesan, oftwolands.com
At the end of the video, I share the full node tree, labeled node by node, so you can drop it straight into your own projects.
OriginalAll 10 tipsBelow each tip is a live preview of the Resolve controls it uses, running on the shot from the video. It’s a simplified preview in your browser, so your exact values in Resolve will differ.
01
Exposure is how much light the image holds, from its darkest point to its brightest. It’s measured in stops, and each stop is twice or half the light of the one next to it.
The HDR panel treats exposure as a set of overlapping brightness zones. Global moves the whole image, while Shadow, Light, Highlight and Specular each reach one part of the tonal range. Range sets where a zone begins, and Falloff sets how gradually it fades, which is what keeps a change from showing a visible edge.
Learn more: Resolve manual: the Zone graph
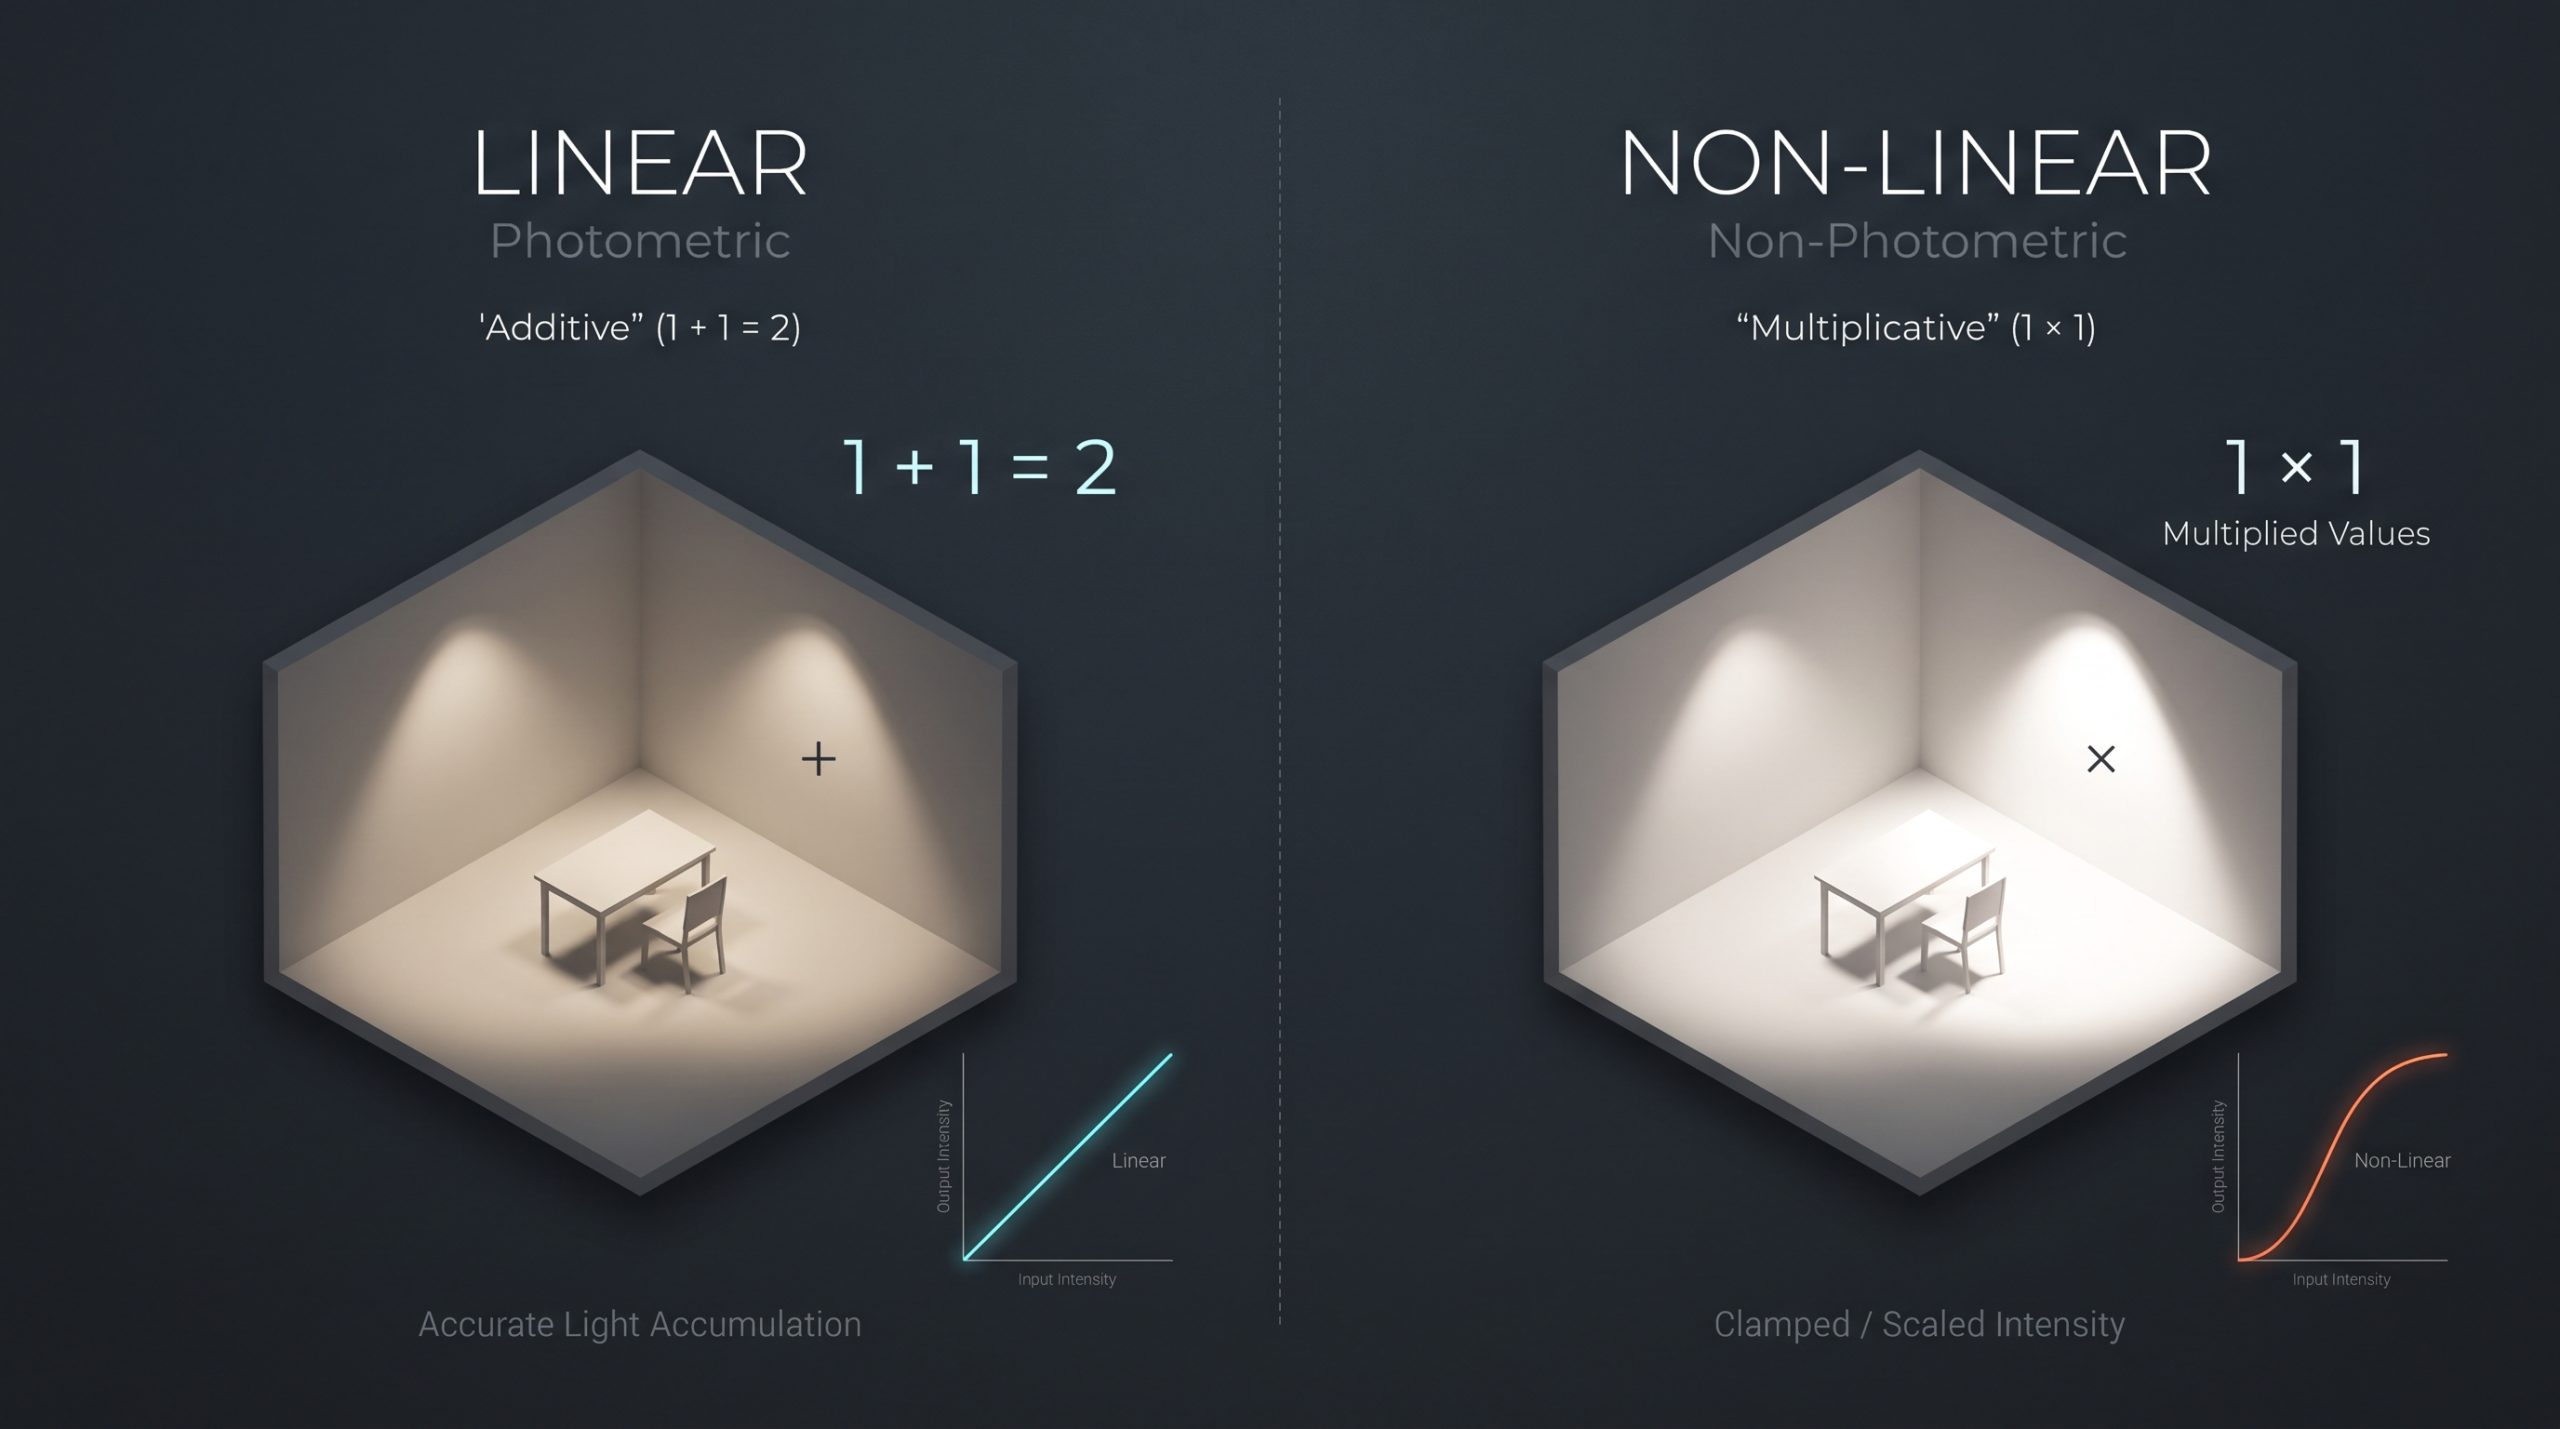
Linear values are proportional to light, so doubling a value is exactly one stop, in the shadows and the highlights alike. Non-linear values, like log or gamma, store light on a curve. The same gain there changes the contrast as well as the brightness.
02
Contrast is the distance between the dark and bright parts of an image. Raising it pushes tones away from a center point called the Pivot, so shadows get deeper and highlights get brighter.
Red, green and blue get pushed apart too, and the distance between those channels is what we see as saturation. That’s why a normal contrast move also adds color. The Luminosity composite mode keeps the node’s brightness change and takes hue and saturation from the image coming into the node, so the color shift is largely removed.
03
White balance is the balance between red, green and blue that makes neutral objects look neutral. When it’s off, the color of the light sits over the whole image as a warm or cool cast.
Linear means the pixel values are proportional to real light. A cast is an uneven amount of light in each channel, so a separate gain on each channel removes it evenly at every brightness. Offset shifts each channel by a fixed amount instead. On a log image it holds up well through the mids and highlights, and it can leave a tint in the deep shadows. Compare the shadows and the RGB Parade below.
Learn more: Resolve manual: node color space and gamma
04
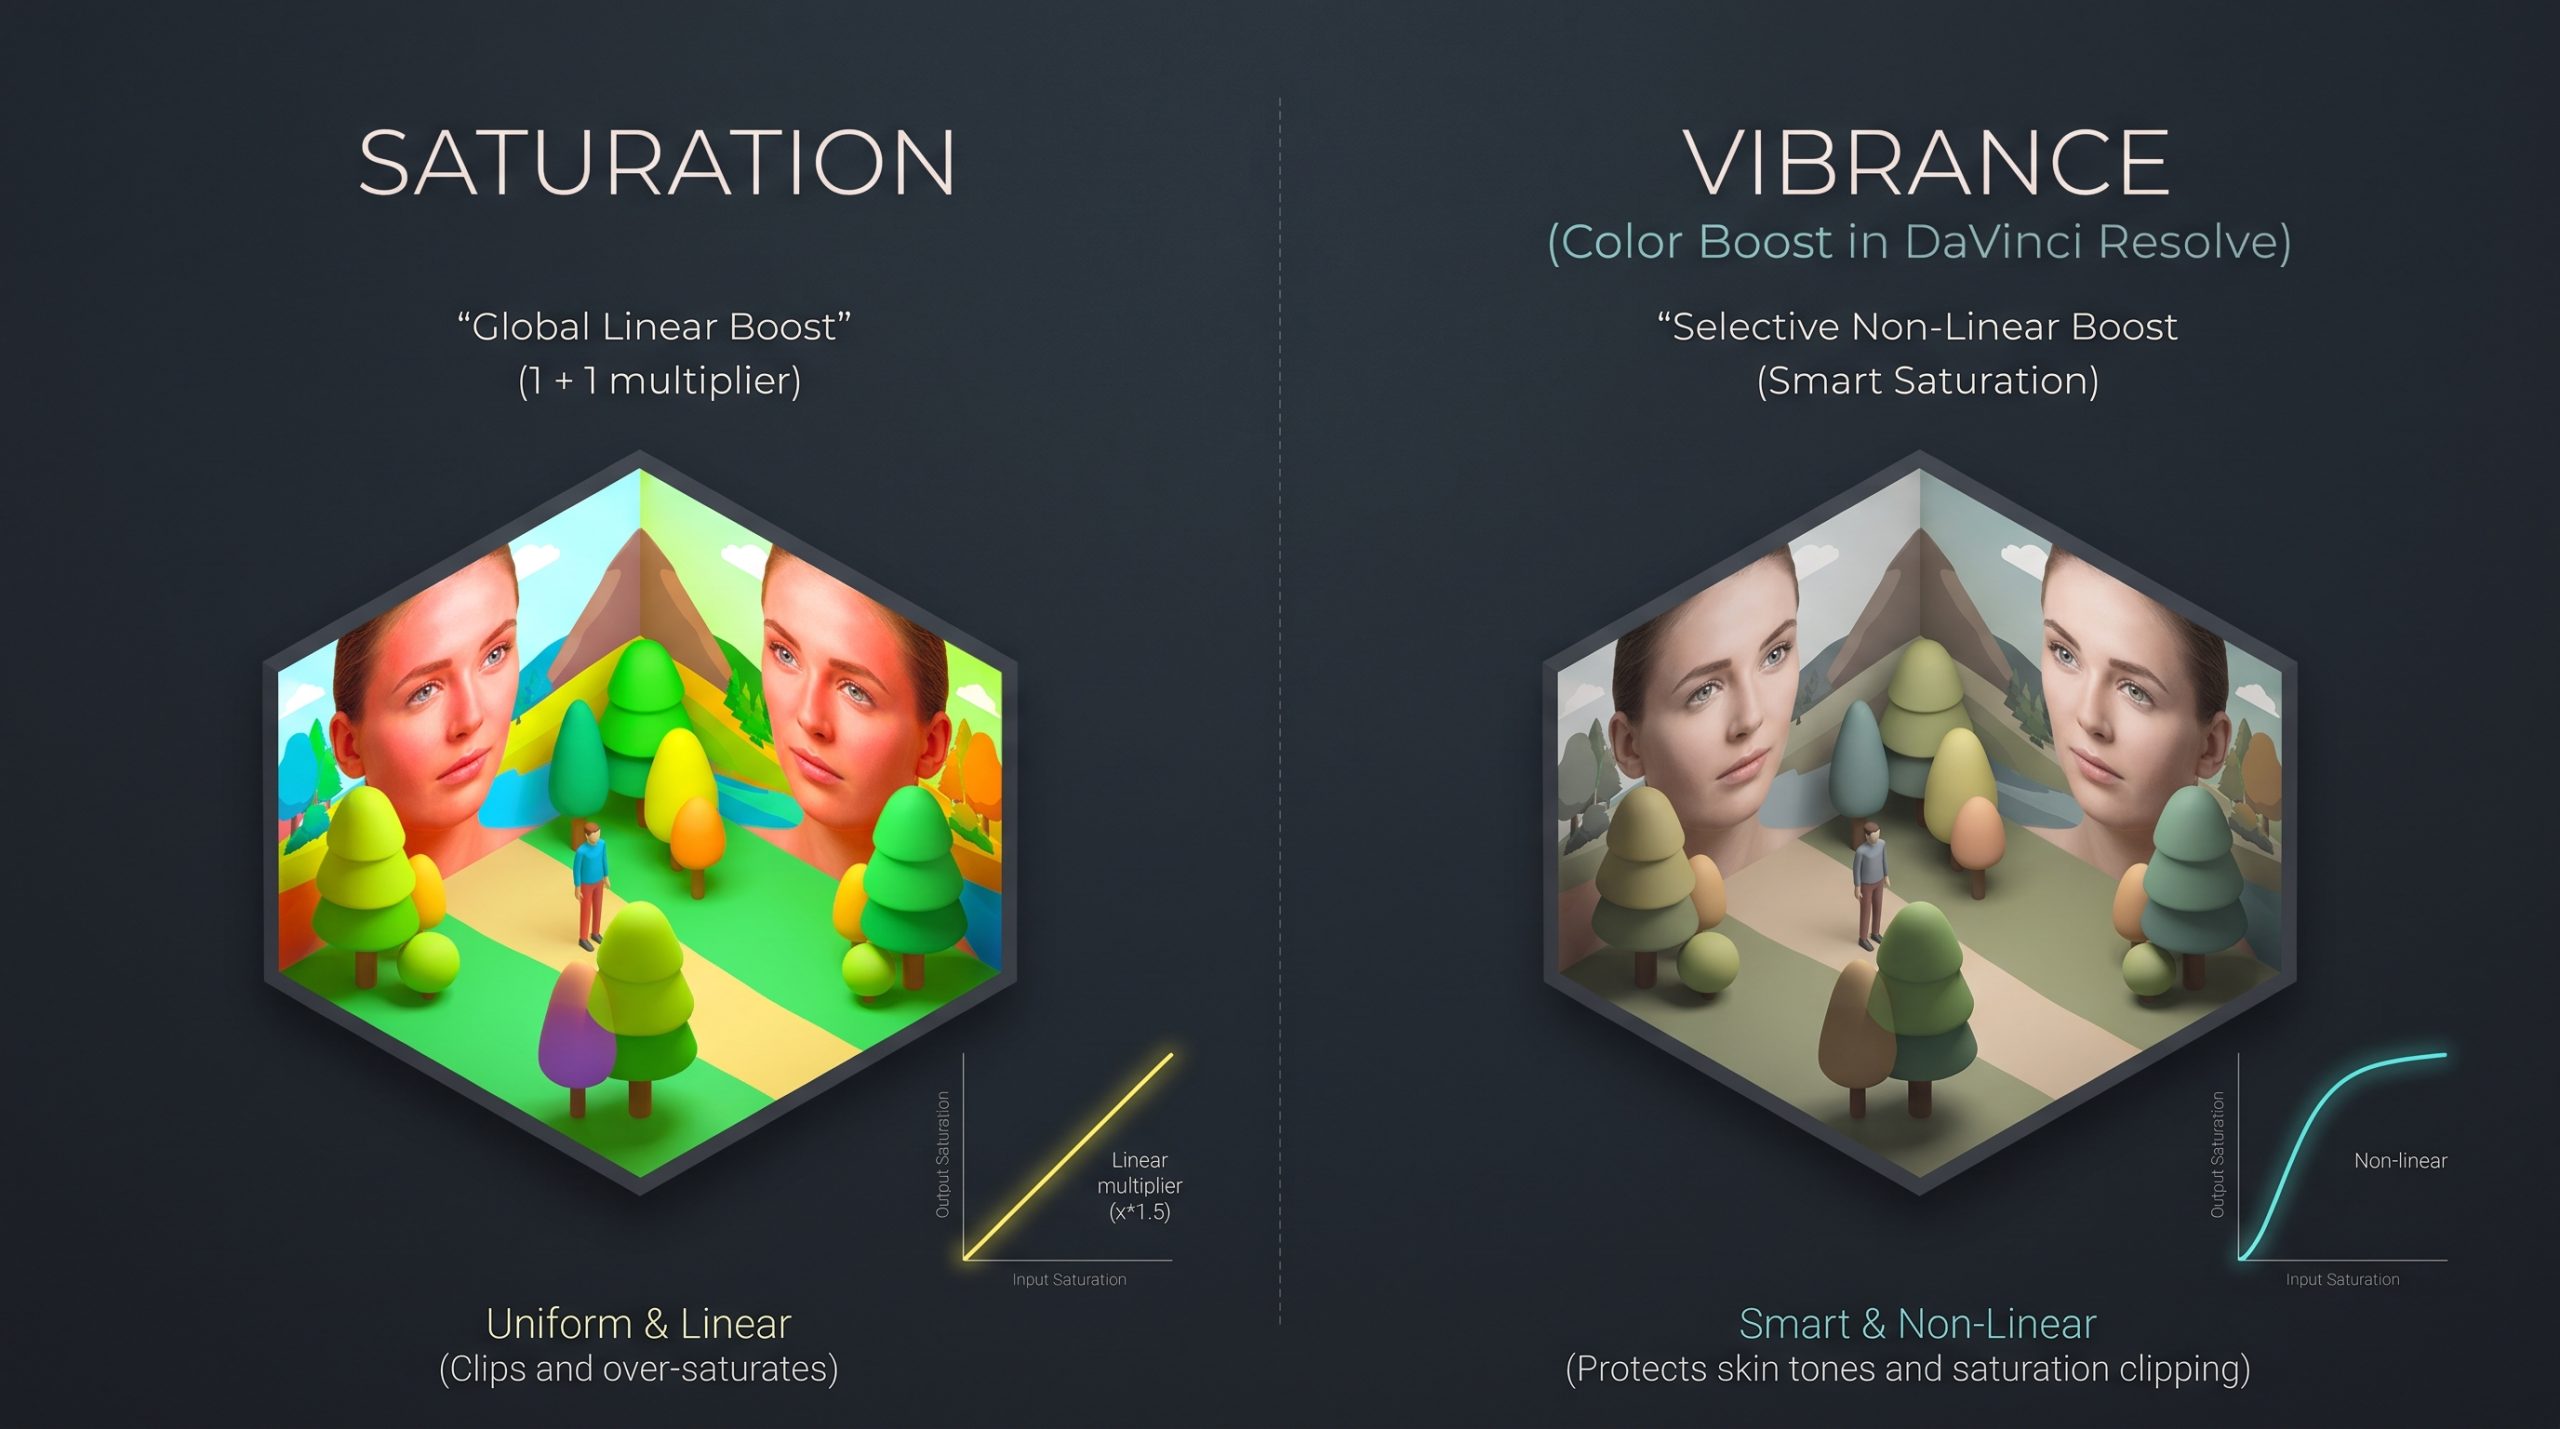
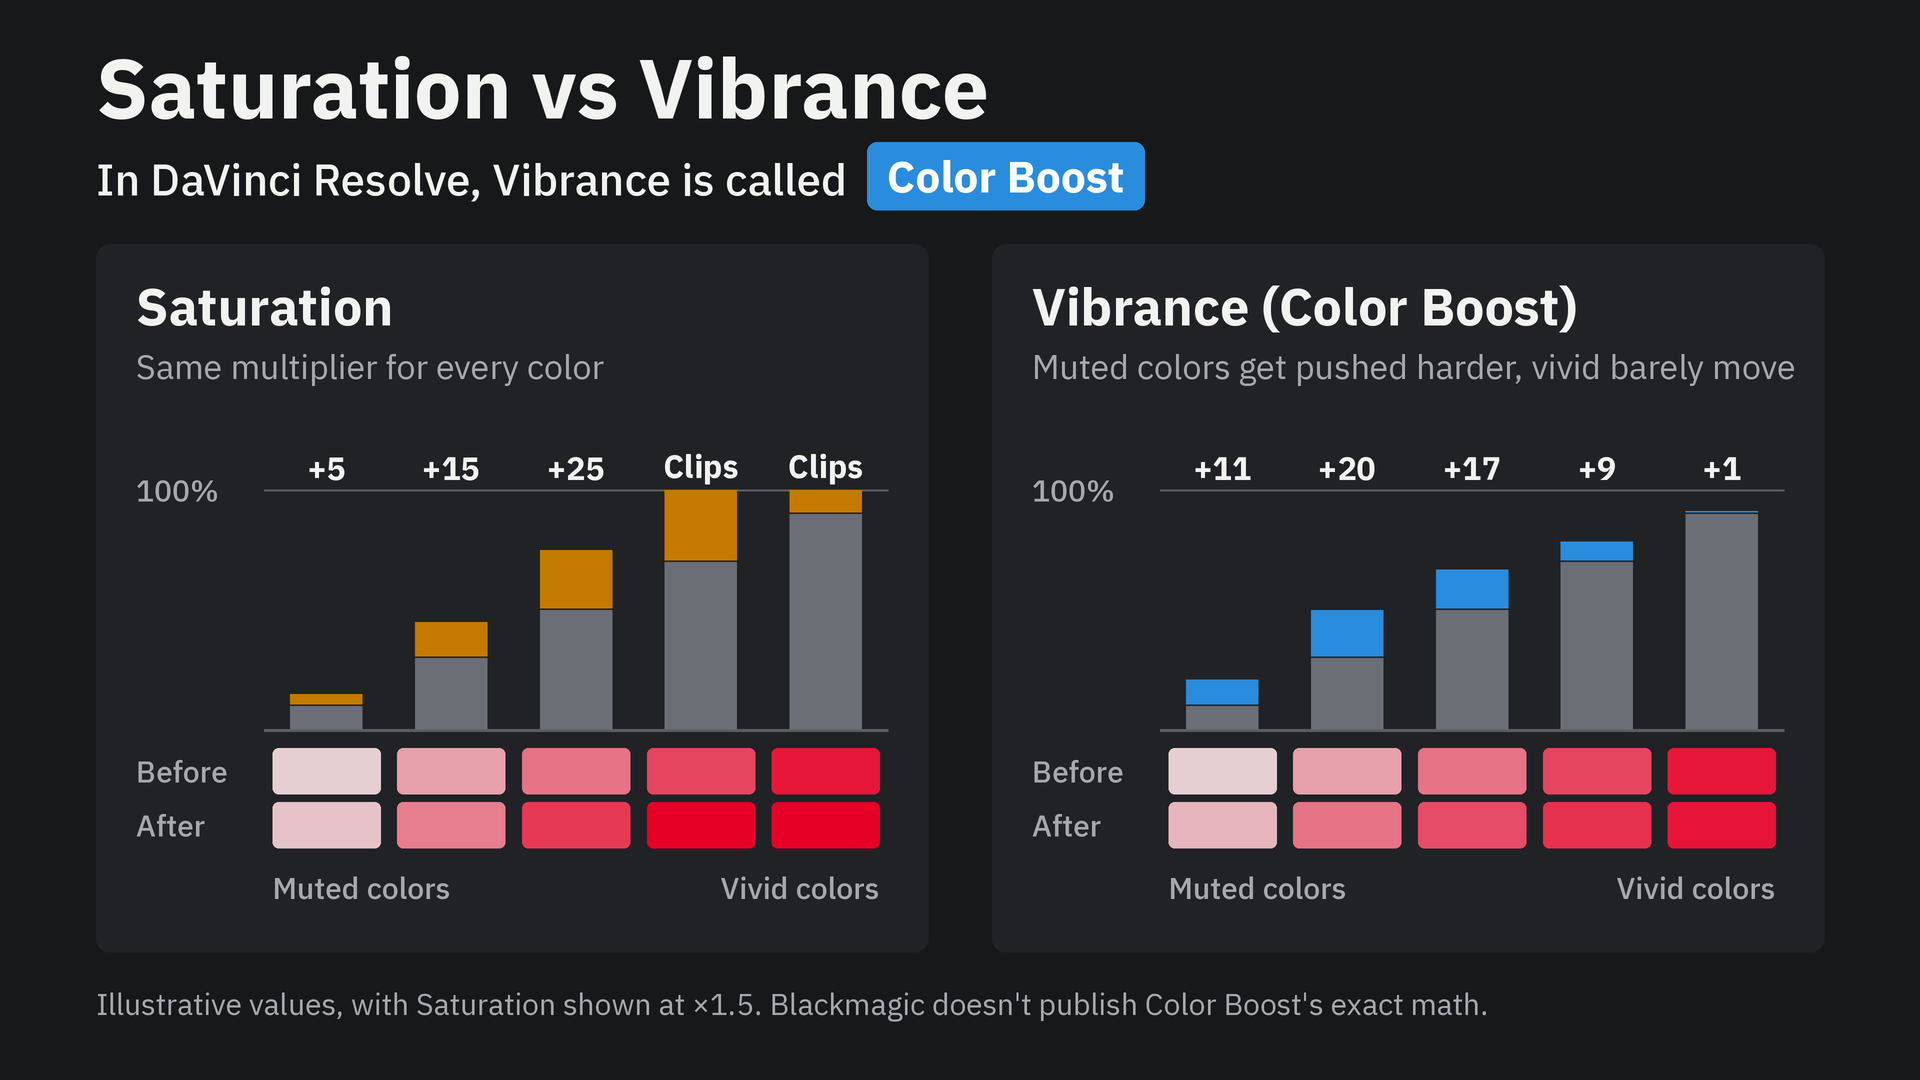
Saturation is the strength of a color, from gray at zero to fully pure. The three controls below raise it in three different ways.
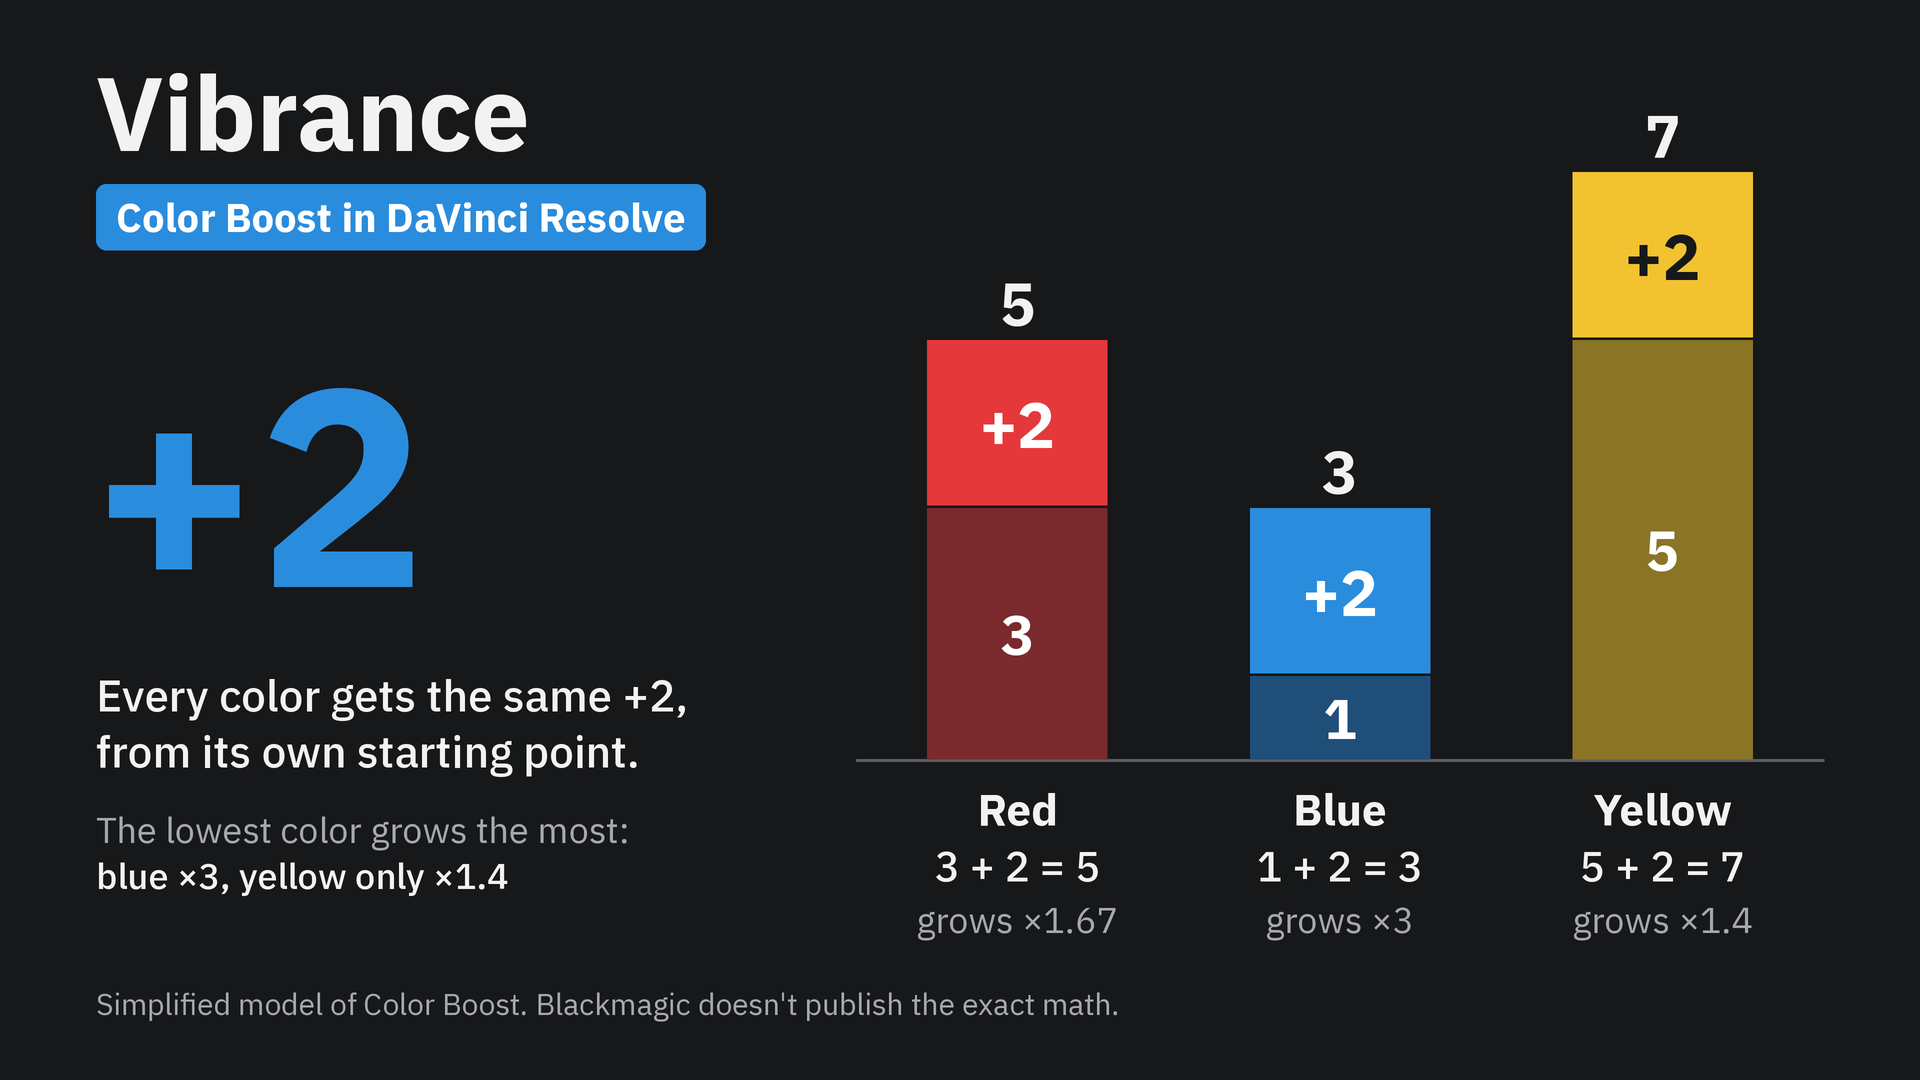
Sat scales every color by the same amount while holding its brightness, so the strongest channel climbs and colors get brighter. Color Boost, Resolve’s version of vibrance, raises low-saturation colors more than ones that are already strong. HSV separates a color into Hue, Saturation and Value. Raising Saturation there holds Value, the brightest channel, and pulls the other two down, so colors become richer and slightly darker.
Learn more: Frame.io: HSV saturation in Resolve
05
Skin shine is the bright, pale patch on a forehead, nose or cheek. It happens when light reflects off the surface of the skin, so it carries the color of the light more than the color of the skin.
Color Compressor pulls a range of colors closer to one Target Color, with separate amounts for hue, saturation and luminance. A Qualifier limits it to the skin. Texture lives in those small differences between pixels, so compressing too far is what makes skin look plastic.
Learn more: Resolve manual: Color Compressor
06
Split tone means giving the shadows and highlights two different colors, most often cool shadows and warm highlights. That color contrast adds depth and is a big part of what reads as cinematic.
The RGB Mixer builds each output channel from a mix of the red, green and blue inputs. By itself it responds to a pixel’s color rather than its brightness, so here a luminance Qualifier gives the shadows and the highlights their own mixer.
Learn more: Mixing Light: revisiting the RGB Mixer
07
Glow is the soft bloom of light around and across the brighter parts of an image, like the look of a diffusion filter.
Shine Threshold decides which brightness levels produce the glow, Spread decides how far it travels, and Gain sets its strength. At a Shine of 0 the whole image feeds the effect, and at a Spread of 0 the light stays where it is. With Soft Light, the result is a gentle lift in the brights and a gentle drop in the darks. Raise Spread to see it become a halo around the windows.
Learn more: Resolve manual: Glow controls
08
Density is the sense that a color is deep and solid. On film, more color means more dye blocking the light, so saturated colors get darker. Standard video saturation tends to do the opposite, and strong colors get brighter and thinner.
A Parallel Mixer blends two versions of the image. In an HSV node the green control acts on Saturation, so the top node adds color and lowers brightness, while the bottom node removes color and holds brightness. Mixed together, you keep about the same amount of color at a lower brightness.
09
Color separation is how clearly the subject stands apart from the background in color and brightness. When the two are close together, the image flattens out.
The Color Warper remaps colors on a mesh, without moving anything in the frame. In the Chroma-Luma tab, one axis of the grid is color strength and the other is brightness. Moving points near the skin tone changes only the colors close to it. Anything with a similar color and brightness moves too, like the warm wood in this shot.
Learn more: Resolve manual: Color Warper
10
Sharpness is how crisp an image looks. Sharpening doesn’t add new detail. It raises the contrast along edges, which your eye reads as detail.
Lab separates lightness (Channel 1) from color (Channels 2 and 3). Sharpening only lightness means edges don’t pick up color fringes. In the Blur tab, a Radius of 0.50 is neutral and lower values sharpen. Small amounts bring out fine texture, like skin and hair, and large amounts turn into high relief, with halos and exaggerated pores.
Learn more: Resolve manual: Blur palette
Great grading isn’t one magic slider. It’s small, smart moves stacked together. Try the tips one at a time, compare each against the original, and keep every adjustment subtle.
If this helped, download the node tree, subscribe on YouTube, and let me know in the comments which tip was new to you.
Ready to put these tricks to work? I’ve packaged up this exact workflow into a fully labeled node tree that you can import directly into DaVinci Resolve.
⇩ Download the free 10-step node treeGet the free version of DaVinci Resolve
Simply download the .drx file, right-click in your gallery to import it, and apply it to your clips to instantly access this entire setup!

